How to Make Wooden Wicks at Home (DIY Guide)
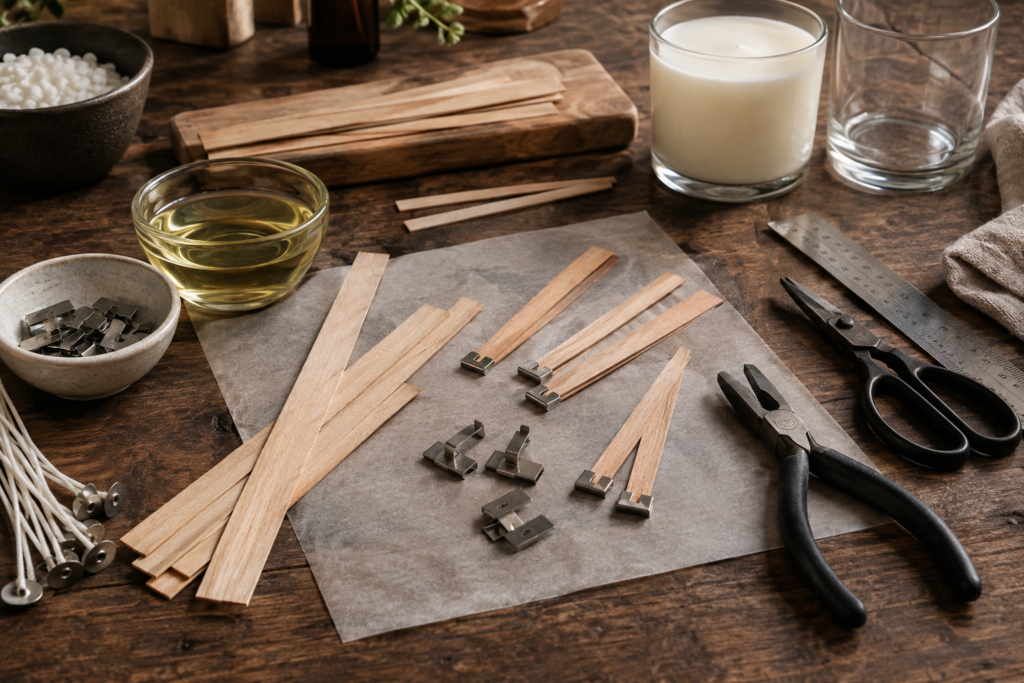
Wooden wicks look deceptively simple. They’re basically just thin pieces of wood, right?
Well… yes and no.
Making one at home isn’t particularly complicated, but getting a piece of wood to actually behave like a reliable candle wick is where things get interesting. The right wood, thickness, preparation and candle setup can make a huge difference.
And that’s exactly what we’re going to explore in this guide.
Before we get started: homemade wooden wicks should be treated as an experiment rather than a guaranteed replacement for commercially manufactured candle wicks. A wick that looks perfect can still burn poorly once it’s combined with a particular wax, fragrance and container. Always test your finished candle carefully before considering it ready for regular use.
Can You Really Make a Wooden Wick at Home?
Yes, you can.
A wooden wick is essentially a thin strip of wood that draws melted wax toward the flame. Commercial wooden wicks are manufactured to specific dimensions and specifications, but the basic idea is simple enough to experiment with at home.
The tricky part isn’t cutting a little piece of wood.
The tricky part is getting that piece of wood to burn consistently as part of an actual candle.
That’s because a wick doesn’t work by itself. Its performance depends on the wood, its dimensions and preparation, but also on the wax, fragrance, container and other parts of the candle formula.
So yes, you can make one at home. Just don’t expect the first strip you cut to magically become the perfect wick.
Why Would You Make Your Own Wooden Wick?
There are actually some pretty good reasons to try it.
First, it’s an interesting DIY experiment. If you already make candles, making your own wick lets you experiment with another part of the candle rather than simply buying every component ready-made.
You can also experiment with different widths and thicknesses and see how they behave in your own candles.
And, of course, there’s the cost. If you have access to inexpensive suitable wood, making a few test pieces doesn’t require much additional equipment.
But there is another side to it.
Commercial wooden wicks are manufactured to be much more consistent than something you cut by hand at home. If you’re making candles to sell or simply want predictable results from candle to candle, buying a tested wooden wick is probably going to save you some time and frustration.
So, is making your own worth it?
If you enjoy experimenting, absolutely give it a try. If your main goal is consistency, commercial wicks may be the better choice.
What Kind of Wood Can You Use?

This is one of the first things you’ll need to figure out.
DIY wooden-wick methods commonly use thin, lightweight woods such as balsa wood, while commercially manufactured wooden wicks can be made from specially selected and processed wood.
For a homemade experiment, you’re looking for wood that is:
- thin and relatively uniform;
- dry;
- clean and untreated;
- easy to cut into narrow strips;
- free from paint, varnish, stains or other coatings.
Don’t use random pieces of treated construction wood or leftover furniture scraps just because they’re thin. You don’t want unknown finishes, glues or chemicals involved in something that will be burned.
For a first experiment, a thin, clean balsa wood strip is one of the easier materials to work with.
Choosing the Width and Thickness
This is where there isn’t really a magic number.
The width and thickness of your wooden wick need to work with the candle you’re making. A wick that works beautifully in a small jar may behave completely differently in a wider container.
That’s why commercially made wooden wicks come in different sizes.
For a DIY experiment, it’s much more useful to make a few variations than to cut twenty identical strips and hope you’ve somehow guessed the perfect size.
You could start with:
- a thinner strip;
- a medium strip;
- a slightly wider strip.
Keep the rest of your candle as consistent as possible when comparing them. That way, if one performs better, you have a much better idea of what caused the difference.
What You’ll Need
You don’t need a huge collection of equipment for this project.
You’ll need:
- thin, untreated wood suitable for making a wick, such as balsa;
- a ruler;
- a sharp craft knife or another appropriate cutting tool;
- sandpaper, if needed to smooth rough edges;
- a shallow heat-safe container for your preparation method;
- candle wax of your choice;
- pliers or tweezers for handling the strips;
- a metal wooden-wick holder/base;
- aluminium foil;
- your candle container for testing.
If you’ve already made your own cotton wicks, you’ll notice that the process is quite different.
Wooden wicks are already rigid, so you don’t need to twist, braid or thread them through a small cotton-wick tab. Instead, the bottom of the wooden strip sits inside a metal holder designed specifically for wooden wicks.
1. Step-by-Step: How to Make a Wooden Wick at Home
Now let’s get to the actual DIY part.
Step 1: Cut the Wood to Size
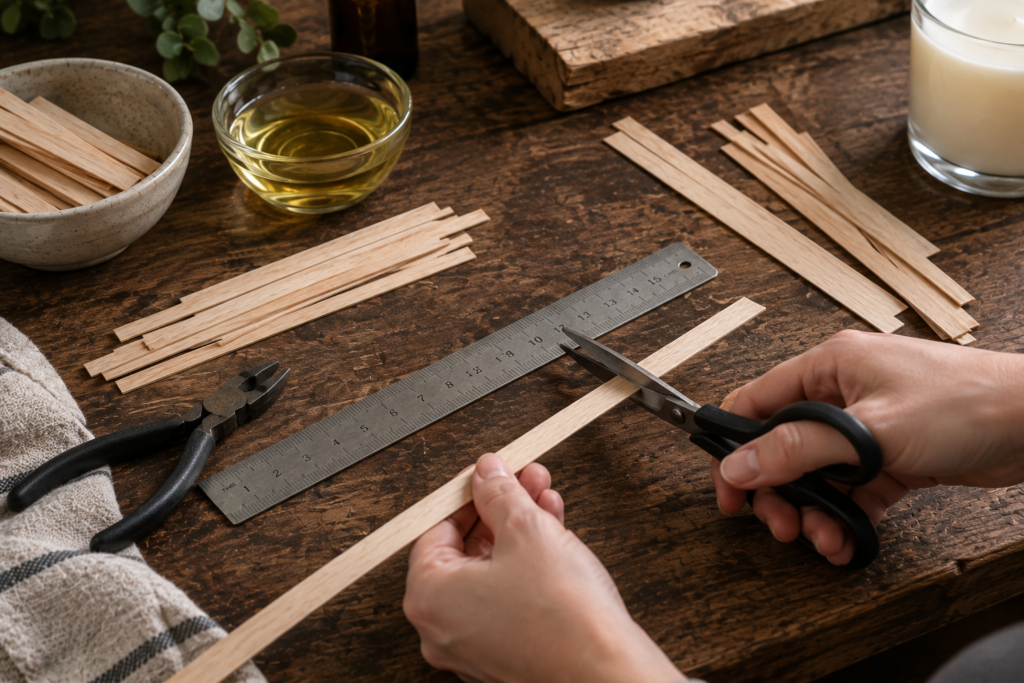
Start by measuring the inside height of your candle container.
Cut the wooden strip so it is long enough to extend from the bottom of the container to slightly above the future wax surface.
Don’t worry about getting the exposed length absolutely perfect yet. You can trim the wick later.
Try to keep your cuts as straight and clean as possible.
If you’re making several test wicks, cut them to the same length first. This will make comparing them much easier later.
Step 2: Prepare the Wood
This is where you’ll find different DIY methods online.
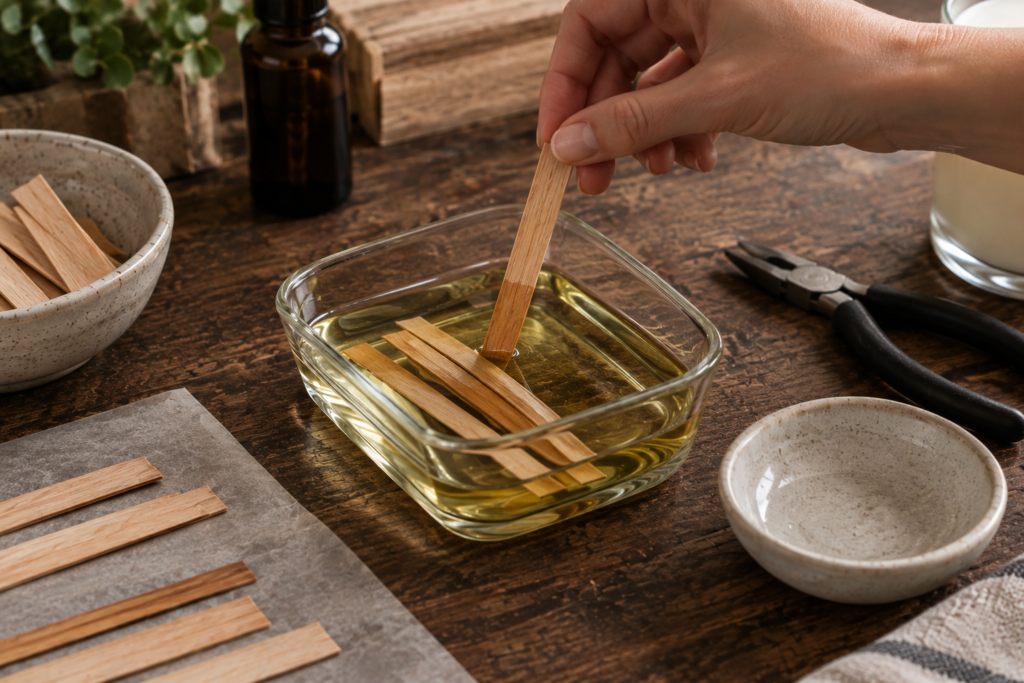
Some homemade wooden-wick recipes recommend soaking the wood in oil before using it. The idea is to allow the oil to penetrate the wood before it becomes part of the candle.
Other methods skip the oil entirely and instead pre-wax the wooden wick by dipping it into melted candle wax.
And then there are methods that use the wood without any treatment.
Commercial wooden wicks are a different situation because the manufacturer has already selected and processed the material specifically for candle making.
If you’re following an oil-treatment method, place your cut wooden strips into a shallow container and cover them with the oil.
Allow them to soak rather than simply brushing a little oil over the surface. You want the treatment to penetrate the wood as evenly as possible.
We’ll come back to the oil-versus-wax question later, because neither method should be presented as a universal requirement for every homemade wooden wick.
Step 3: Remove the Wicks and Let Them Drain
Once your wood has finished soaking, carefully remove the strips.
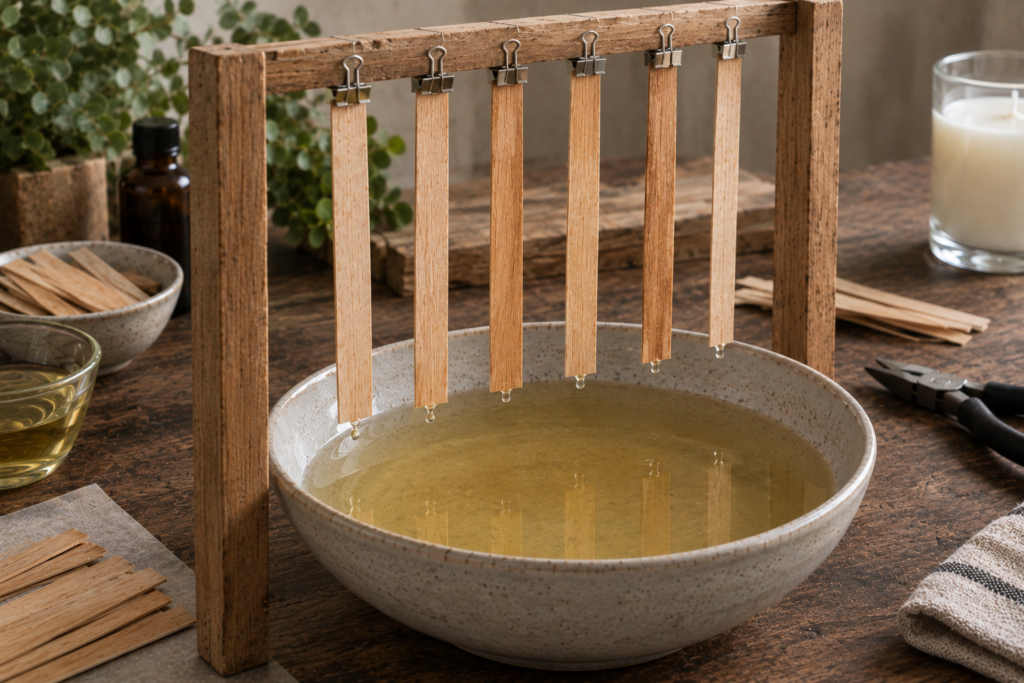
Place them individually on aluminium foil and allow the excess oil to drain away.
You can also hang the individual pieces if you have a simple way to suspend them. This can make it easier for excess oil to drip away instead of collecting underneath the strips.
Don’t rush this part.
You don’t want the wooden strips to still be dripping with oil when you move on to the next stage
Step 4: Attach the Wooden Wick to Its Metal Holder
Once the wooden strips are ready, it’s time to attach the metal base.
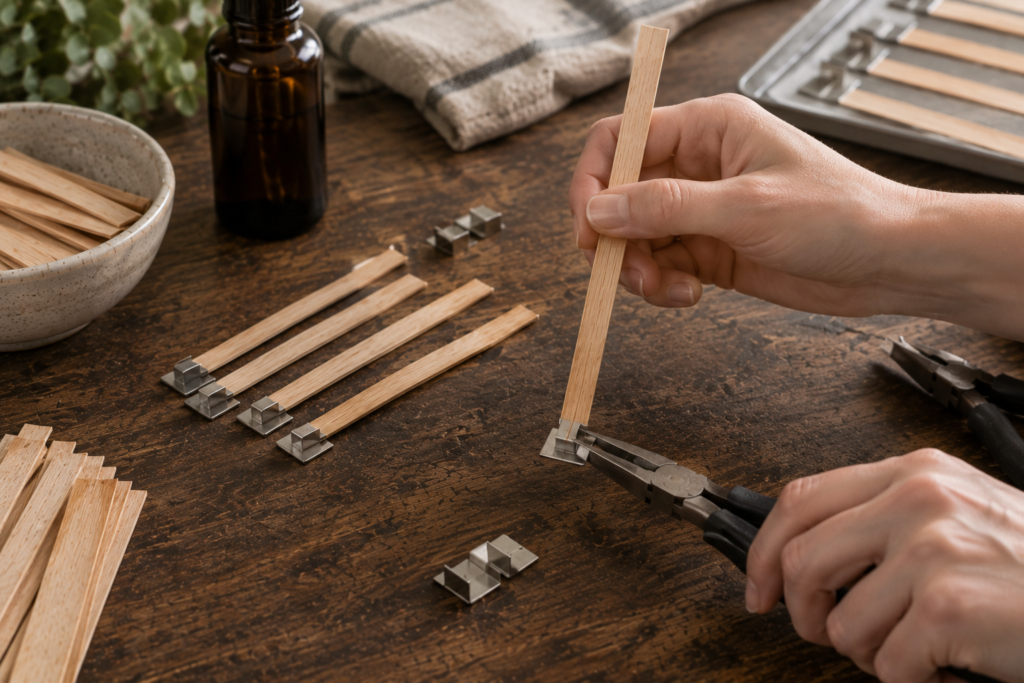
Slide the bottom of the wooden strip into the metal holder designed for wooden wicks.
The wood should sit securely inside the holder and remain straight.
Depending on the holder you’re using, you may need to gently secure the metal around the wooden strip with pliers.
Don’t crush the wood. You just want enough pressure to keep it firmly in place.
A quick note about wooden wick holders
Wooden-wick holders are different from the small round metal tabs normally used with cotton wicks.
They’re specifically shaped to grip the flat wooden strip.
If you’re buying them rather than making your own, make sure the holder is compatible with the width and thickness of your wooden wick.
Step 5: Attach the Wick Base to the Candle Container
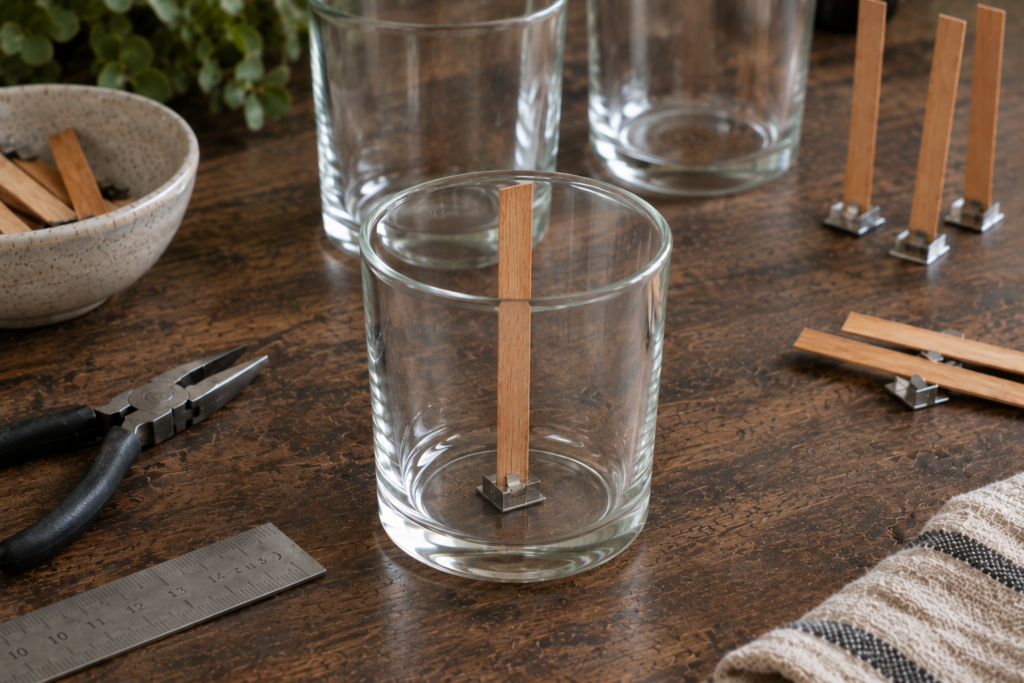
Now you can attach the metal holder to the bottom of your candle container.
A wick sticker is the easiest option for most home candle makers.
You can also use a small amount of hot glue as an alternative if that’s what you have available.
Apply the adhesive to the underside of the metal holder, position it on the bottom of the container and press it firmly into place.
Take a moment to check that the wick is positioned where you want it before moving on.
Once the wax is poured, moving it isn’t going to be nearly as easy.
Step 6: How to Keep the Wooden Wick Centered
Because wooden wicks are rigid, keeping them upright can actually be easier than working with a flexible cotton wick.
Still, you want to make sure the wick doesn’t shift while you’re pouring and while the wax is cooling.
A wooden clothespin, pencil or pair of wooden chopsticks can all be used to hold the upper part of the wick in position. But you don’t essentially need anything to make a wooden wick stay in place.
Step 7: Pour the Candle
Once your wooden wick is secured and centered, you’re ready to pour your candle.
Melt your candle wax according to the instructions for the particular wax you’re using, then add fragrance and any other ingredients according to your candle recipe.
Before pouring, take one last look at the wick.
Is it still centered?
Is the metal holder firmly attached?
Is the wooden strip straight?
Fixing something now is much easier than trying to fix it once the wax has hardened.
Pour the wax carefully around the wick and allow the candle to cool completely.
8. Should You Use Oil or Not? Should You Dip the Wooden Wick in Wax?
his is probably one of the more debated parts of making wooden wicks at home.
Some DIY methods recommend treating the wood with oil before using it. Other candle makers don’t consider oil treatment necessary, particularly when working with commercially manufactured wooden wicks.
You’ll also find instructions recommending that wooden wicks be dipped in melted wax before being installed.
So what’s the correct method?
There isn’t one answer that applies to every homemade wooden wick.
Oil treatment, wax dipping and leaving the wood untreated are all approaches you’ll find discussed, and the differences are partly related to the type of wood and the candle system you’re working with.
For a DIY experiment, this actually gives you something useful to test.
You could compare:
- an untreated wooden strip;
- an oil-treated wooden strip;
- a pre-waxed wooden strip.
Keep the rest of the candle as consistent as possible and see how each one behaves.
The important thing is not to assume that adding another preparation step automatically makes the wick better.
If you’re experimenting with oil, allow excess oil to drain properly before continuing. And if you’re trying pre-waxing, remember that you’re simply adding another variable to the experiment.
Your candle will ultimately tell you more than a recipe claiming that one method is always the best.
9. Testing Your Homemade Wooden Wick

This is where the real experiment begins.
Getting a wooden strip to light isn’t enough, you want to see how it behaves once it’s actually part of a candle.
Pay attention to things such as:
- flame size and stability;
- whether the wick stays lit;
- how the melt pool develops;
- whether the wax melts evenly;
- excessive smoke or soot;
- how much the wick chars;
- whether the candle behaves consistently after relighting.
If something doesn’t work, try changing one variable at a time.
For example, try a different wick width before changing the wood, wax and fragrance all at once.
Otherwise, you won’t know what actually improved or worsened the result.
Why Homemade Wooden Wicks Can Be Inconsistent
Even two strips that look almost identical can behave differently.
Small differences in:
- wood thickness;
- wood density;
- width;
- oil absorption;
- preparation;
- wax;
- fragrance;
- container diameter
can all affect the final burn.
And then there’s the candle itself.
Change the wax and the result can change.
Change the fragrance and it can change again.
Use a wider container and you may need something different.
This is why a homemade wick that works beautifully in one candle shouldn’t automatically be considered a universal wick for every candle you make.
The goal isn’t necessarily to discover one magical strip of wood that works everywhere. It’s to find combinations that work reliably for the candles you’re actually making.
If you’re dealing with tunneling, soot, weak flames or other candle-burning problems, our guide Common Candle Problems and How to Fix Them can help you troubleshoot those issues in more detail.
11. Is Making Your Own Wooden Wicks Actually Worth It?
Honestly?
That depends on what you want from the project.
If you enjoy experimenting, making your own wooden wicks can be a really interesting part of candle making. You get to play around with different materials and see firsthand how much the wick affects the finished candle.
If you’re looking for something predictable and repeatable, however, commercially manufactured wooden wicks have a pretty obvious advantage.
They’re made to consistent specifications, and you can choose from different sizes rather than cutting and testing everything yourself.
So we’d say:
Make your own if you enjoy the experiment. Buy them if you value consistency more than the experiment itself.
Neither option is wrong.
12. Homemade Wooden Wicks vs. Commercial Ones
If you’ve made it this far, you probably already have a pretty good idea of the difference.
Homemade wooden wicks give you:
- freedom to experiment;
- the ability to create different dimensions;
- a low-cost DIY project;
- a better understanding of how wooden wicks behave.
Commercial wooden wicks give you:
- more consistent dimensions;
- predictable manufacturing;
- a wider range of ready-made sizes;
- less trial and error.
Final Thoughts
Making a wooden wick at home isn’t particularly complicated. The complicated part is getting one that burns well and keeps doing so consistently.
Start simple. Use clean, untreated wood, experiment with your preparation method, keep your wick centered and, most importantly, test the finished candle before deciding that you’ve found your perfect formula.
And if you decide that homemade wooden wicks aren’t worth the trial and error for your particular candles, that’s completely fine too. Sometimes the most useful thing you can learn from a DIY experiment is knowing when buying the finished component makes more sense.
We hope this guide gave you a better understanding of how homemade wooden wicks work and gave you a good starting point for your own experiments. If you try making one, let us know how it goes in the comments — especially if you discover a method that works surprisingly well (or spectacularly doesn’t!).