How to Make a Cotton Candle Wick at Home (Easy DIY Guide)

Your candle needs a wick. Have you decided to buy pre-made ones or try and make your own cotton wicks at home? Keep reading for the ultimate guide on how to make DIY candle wicks with cotton string!
In this guide, we’ll go through the materials you need, how to treat and wax your cotton string, and a few things to consider when choosing the thickness of your homemade wick.
One of the biggest advantages of making your own candle wicks is the flexibility to experiment with different lengths and thicknesses for different candle sizes.
If you’re a big fan of Wooden Wicks, don’t worry friends, we got you! Check out How to Make Wooden Candle Wicks at Home.
What Kind of Cotton String Should You Use?
For making homemade candle wicks, look for:
- 100% cotton
- Undyed or natural cotton, when possible
- String without synthetic fibres or polyester blends
- Plain twine that isn’t heavily coated or treated
Cotton twine suitable for this purpose is sometimes sold as butcher’s twine or butcher’s string, although not every product marketed under those names will necessarily be 100% cotton. Always check the material before using it for candle wicks.
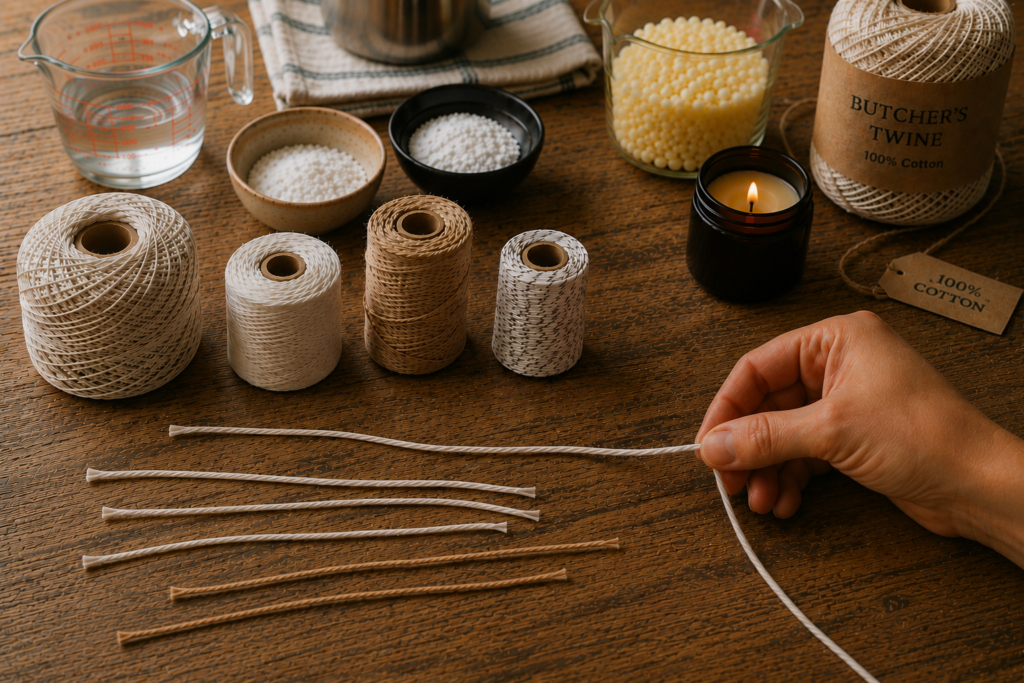
Can I Use the Cotton String I Already Have at Home?
Maybe—but check the material first. If your string is made from 100% cotton and doesn’t contain polyester, nylon or other synthetic fibres, it may be suitable for experimenting with homemade candle wicks.
Avoid decorative, heavily dyed or coated string, and always test the finished wick before using it in an important candle project.
Benefits of Making Your Own Cotton Wicks
- Affordable and easy to find – Cotton twine is inexpensive and widely available.
- Versatile – Cotton wicks can be used in many different candle projects and adapted by changing the number of strands.
- Customisable – You can experiment with different lengths and thicknesses to suit different candle sizes.
- Easy to experiment with – Homemade wicks allow you to test different combinations before deciding what works best for your candle.
What You’ll Need
- 100% cotton twine or butcher’s twine — make sure it doesn’t contain polyester or other synthetic fibres
- Scissors
- Pliers or tongs — to remove and handle the wicks after dipping them in warm wax
- 4 tbsp borax powder (60 ml)
- 2 tbsp salt (30 ml)
- 1.5 cups of water (300 ml)
- Wax of your choice
The Process
1) Get Your Wicks Ready
Use a ruler to measure and cut your cotton twine to the desired length. Consider the size of your candle when deciding how long your wicks need to be.
No matter the size of your candle, you’ll generally want to cut the twine at least 3 inches (7 cm) longer than the height of the candle. This gives you enough extra length to work with when placing and securing the wick.

Choosing the Thickness of Your Wick
The number of cotton strands you use can affect how your candle burns. You can experiment with:
- Single strand – potentially suitable for experimenting with very small candles.
- Double or twisted strands – useful when testing a slightly thicker homemade wick.
- Braided or multiple strands – can be used to create thicker wicks for larger candle projects.
Important: more strands don’t automatically mean a better wick. The ideal thickness can depend on the diameter of your candle, the type of wax you use and the fragrance concentration, so it’s always worth testing different options.
2) Dissolve the Salt and Borax

Heat your water using a small saucepan or kettle until it reaches a simmer, then add the salt and borax. Mix carefully until everything is fully dissolved.
The borax-and-salt treatment is used in homemade wick recipes to prepare the cotton before it is coated in wax. The goal is to help create a wick that burns more consistently, although the final performance will still depend on the candle and wick size.
Important: Handle borax powder carefully and avoid creating or inhaling dust. Work in a well-ventilated area, wear protective gloves and safety glasses, and keep the powder away from children and pets. Follow the safety instructions and Safety Data Sheet provided with the specific product you are using.
3) Soak the Twine in the Solution

Submerge your cotton twines in the solution, making sure they are fully covered. Allow them to soak for at least 8 hours.
Leaving the twine in the solution for up to 24 hours can give the treatment more time to fully penetrate the cotton.
4) Dry Your Wicks
Use tweezers to carefully remove the twines from the borax solution. You may notice a buildup of crystals on the wicks caused by the salt and borax solution. If this happens, simply rinse them lightly with water before leaving them to dry.
Hang the wicks somewhere suitable and allow them to dry completely. This process should take at least 48 hours, although drying time can vary depending on the environment.
You can place aluminium foil beneath them to catch any excess solution. Alternatively, you can leave the twine to dry flat on paper towels or newspaper.
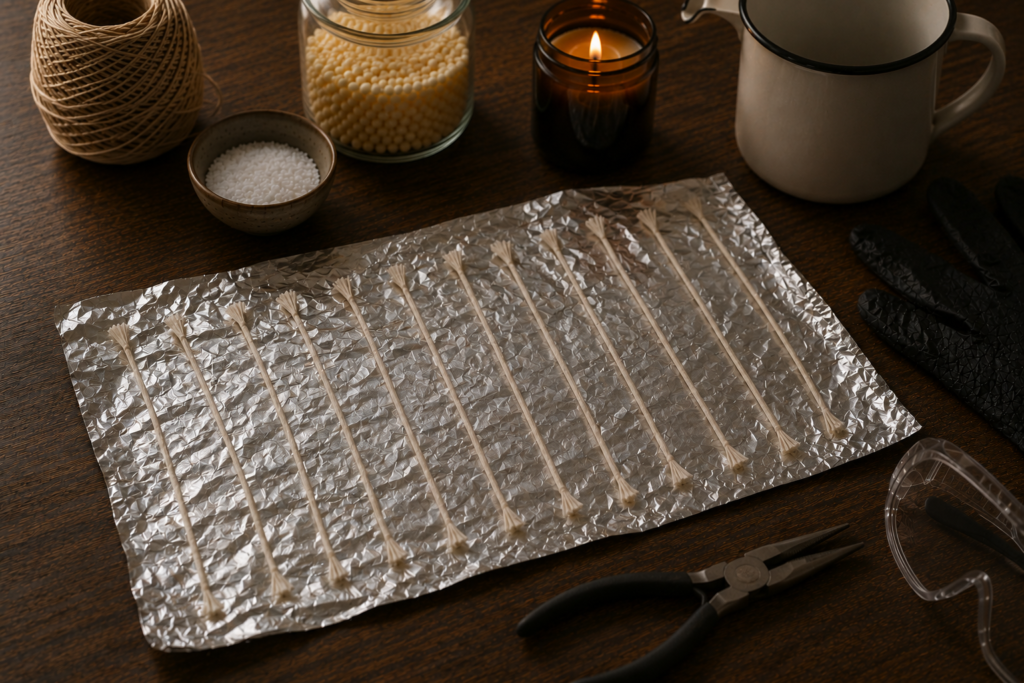
Important: do not dip the cotton into melted wax until the twine is completely dry.
5) Melt Wax into a Container
After about 48 hours, we’re ready to melt some wax. The process of covering the cotton twines with wax helps create a more even-burning wick and stiffens everything, helping it stand straight when you cast it in the candle mould.
Select about 1/4 to 1/2 of a cup (60 to 125 ml) of wax and melt using whichever method you prefer, stirring carefully until it is completely liquefied.
Make sure you have enough melted wax to fully coat the section of twine you plan to turn into wicks.
6) Dip Your Treated Twines
Dunk the treated and fully dried twines into the melted wax, making sure they are completely coated. Allow them to soak for around a minute so the wax can properly cover the fibres.
Carefully remove the twines and allow the excess wax to drip off before leaving them to cool and solidify.
For safety, use tongs or pliers if needed to avoid burning your fingers when handling the hot wax and twine.

7) Allow the Wax to Dry
Hang or lay the coated twine somewhere suitable and allow the wax to cool and solidify.
This should take around 10 minutes, depending on the temperature of the room and the amount of wax coating the wick.
Make sure the wax has fully hardened before handling or dipping the wick again.
8) Repeat if Needed
Repeat the wax-coating process if needed. Ideally, the finished wick should feel stiff enough to stand upright while still having some flexibility.
You can add another coating if the wick still feels too soft, or skip this step if you are satisfied with the result.
Let the wax fully solidify between each coating.
9) Your Wicks Are Ready to Be Used
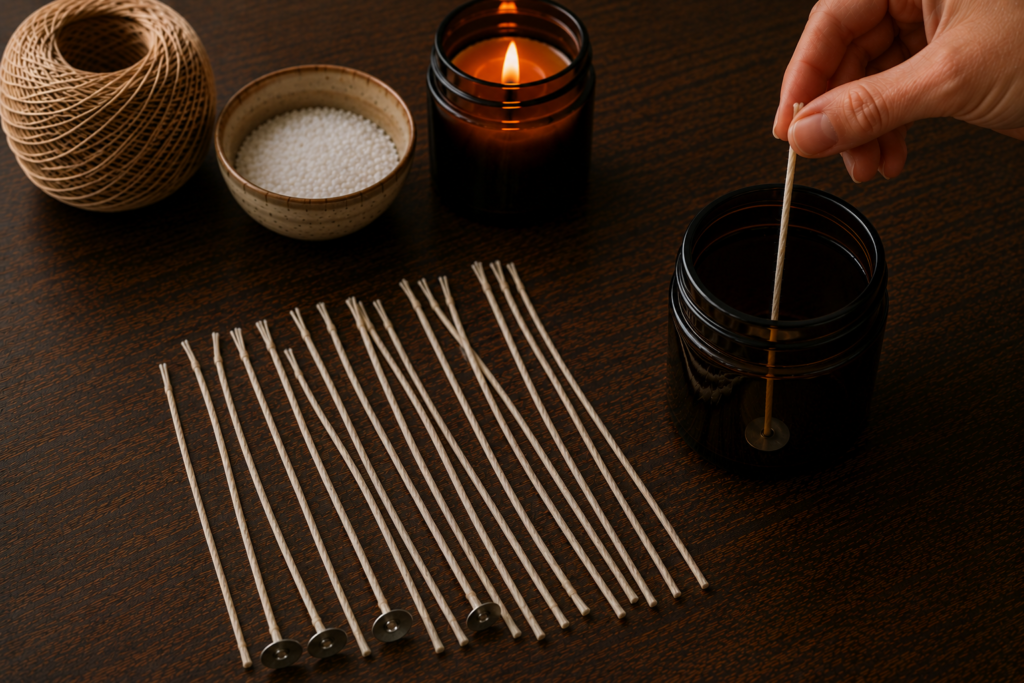
Now your fully coated 100% cotton wicks are finished and ready to be placed into a candle.
You can use different methods to position and secure them, including wick sustainers or adhesives at the bottom. Once the wick is in place, you can keep it upright using a wick-centering tool.
If you’re working with basic materials at home, a simple toothpick, clothespin or similar tool can also help keep the wick centered while the wax cools.
If you’d like to learn more about the different ways to secure and center a wick inside a candle container, check out How to Attach and Center a Candle Wick.
Before using a homemade wick in an important candle project, it’s always a good idea to test the final wick, wax and candle burning first.
Can I Make a Candle Wick Without Borax?
Yes. Borax is commonly used to treat cotton in homemade candle wick recipes, but it isn’t essential. A simpler method is to coat cotton twine directly with melted wax.
However, the treatment method can affect how the wick performs, so whichever method you choose, testing the finished wick is still important.
Troubleshooting in Homemade Candle Wicks
My Wick Is Too Small and the Flame Keeps Dying
The wick may be too thin for the candle or unsuitable for the wax you’re using. Try testing a thicker wick or a different number of strands.
My Wick Produces a Flame That Is Too Large
The wick may be too thick or have too many strands. Try trimming it before burning and test a thinner wick construction if necessary.
My Homemade Wick Produces Too Much Smoke or Soot
The wick may be too large, too long or unsuitable for the wax and fragrance combination. Try trimming it and testing a thinner version.
My Wick Keeps Leaning or Falling Over
The wick may not have enough wax coating, may still be too soft or may not have been properly centered while the candle cooled.
Try adding another wax coating and using a centering tool to hold it upright.
My Candle Tunnels Around the Wick
The wick may be too small for the candle diameter, or the candle may need a thicker wick. Tunneling is a a whole topic in and of itself in candle making, and you need to factor in many components when trying to Fix Candle Tunneling.

For more help with candle-making issues, you may also find our guide useful: Common Candle Problems and How to Fix Them.
We hope this guide was helpful, don’t forget to comment below and ask us anything!